Back last week (I think, time goes by so quickly sometimes!) the sun was shining and I was suddenly presented with An Opportunity - Littlest Boy had fallen asleep (and stayed asleep despite the transfer from car to bed) and the other two Littlies were at school/nursery; and The Inspiration - I'd had an idea a while back for a bracelet and after reading some blog posts about the Liberty Scrap Challenge I was suddenly struck with an idea of how to use some Liberty of London fabrics that I had lying around. I siezed the time to try it out!
I'm so pleased with how my wrap bracelet came out and have been wearing it nearly every day since. I'm even thinking of making one out of one strip of fabric with maybe some fancy stitching down each side to jazz it up.
Would you like to see how I made it??? You will need;
Ingredients
A tape measure
Scraps of fabric 2" wide
A length of interfacing 2" wide
Some ribbon/ric-rac
A toggle & clasp
Contrasting/Complementary/Matching thread
Method
1. First off, you'll need to measure your wrist, and then decide how many times you would like the bracelet to wrap around your wrist (my wrist is 6.25" and I wanted 3 wraps which gives me a total length of 18.75")
 |
| Very tricky pic to take yourself - there's a dinosaur weighing it down!! |
Tip: the looseness in this bracelet comes from the length of the toggle clasp & ric-rac. I have found that the bracelet does stretch with wear and found it to be a perfect fit for me but if you like looser bracelets then you might want to add on a bit of extra length
I was looking to use some Liberty of London scraps (this seems such a derrogatory term for such beautiful fabrics!) that I've been saving. I'd cut 5 different lengths of fabric and allowed a 1/4"seam for each join as well as a 1/2" fold over at each end), so in total I was looking for a length of 21.75" pre-sewing. Alternatively, you could just sew lots of strips of fabric together and trim to size!
 |
| Fabrics all laid out and ready to sew |
 |
| Sewing together with a 1/4" seam |
2. Once you've sewn all your pieces together, give it a good press. I pressed my seams open as I wanted the bracelet to be as smooth as possible.
 |
| Pressing my seams open |
3. Iron interfacing on to the wrong-side of the fabric to give it a bit of extra weight and strength - this may not be necessary depending on the fabric that you're using. At this point, I also folded the entire length of the bracelet in half and then each edge into the middle - much as you would with bias binding - and gave it a good press.
 |
| Ironing on the interfacing |
 |
| Pressing into quarters |
4. Back at the sewing machine, I chose to do some decorative stitching between each fabric join. I thought this would help to tie each of the fabrics together and give me a chance to use some of my machine stitches that I don't often use!
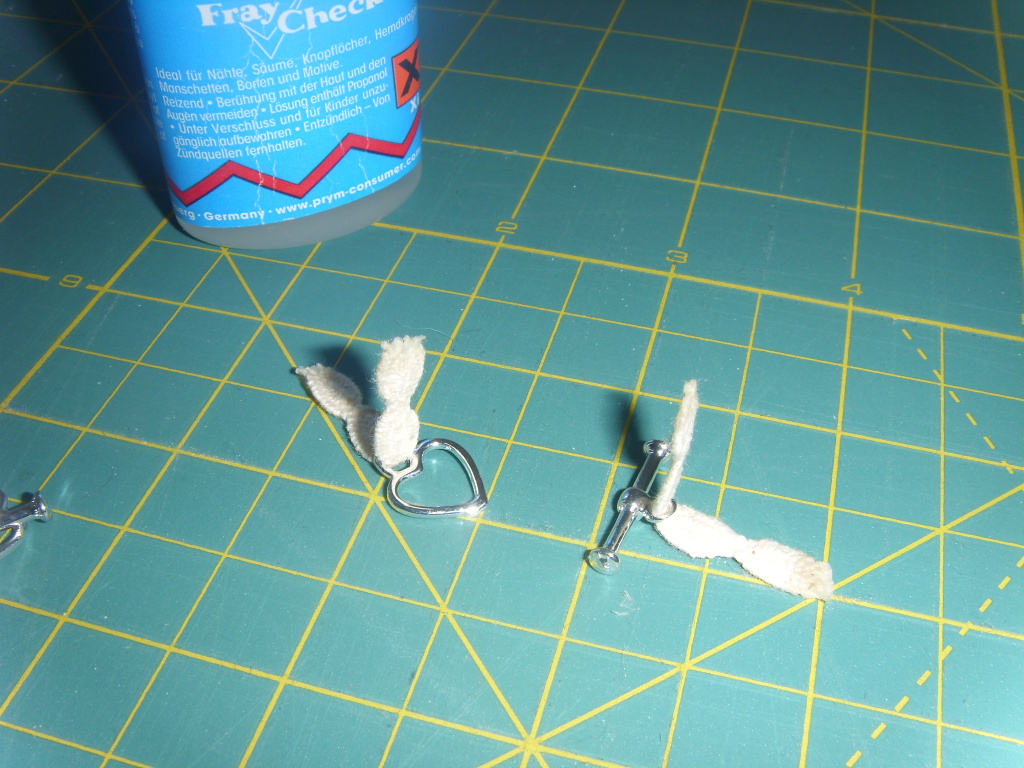
5. I'm using a toggle and clasp at each end and attached these using some ric-rac that I had lying around. I used some fray check to stop it fraying too badly. It is a little bit of a fiddle to get the toggle onto the ric-rac - there's a fair bit of wriggling and pulling but I got there eventually! You could easily use ribbon or small scraps of fabric instead.
6. Fold over the ends of your bracelet by about 1/2", position your toggle/clasp into one of the outside quarters (as marked by your iron creased lines!) and stitch into place. I used a sewing machine but it could easily be done by hand. Although not necessary, I found it really tricky to keep them in the right position whilst sewing around the perimeter without securing them beforehand.
7. Sew around the perimeter of your bracelet - I started near the top corner and adjusted my machine so that it was sewing on the furthest edge. When you reach each end of the bracelet very carefully sew across the bottom - I found it easier to do this manually as the layers of fabric are quite thick and you are so close to the edge it could easily get knarled in the machine. I also chose to do an extra line of stitching at each end. Overlap the beginning and end stitches to make sure that nothings going to start unravelling.
8. Put it on your wrist and enjoy!!!
If you love the bracelet but don't have the time to make one then please let me know/visit my shop and I will make one to order
I hope this all makes sense - it is my first tutorial so please let me know if anything could be made clearer.
Selling Rights: I would love for you to make a bracelet for yourself from this tutorial. If you make bracelets to sell from this tutorial then please credit me with the designLabels: craft, sewing, tutorials